Install and Run Molywood in Linux
Important!
The molywood tool has been developed in Python version 3 and therefore it must be run over a Python 3 installation or environment.
Here you have an installation tutorial for install Molywood in case you have some of the dependencies already installed (e.g. VMD, FFmpeg or ImageMagick). If this is not your case, please go back to the tutorials page and choose the one more suitable to your case.
First off, let's install molywood:
$ pip install molywood
Collecting molywood
  Downloading molywood-0.153-py3-none-any.whl (52 kB)
     |████████████████████████████████| 52 kB 423 kB/s
Installing collected packages: molywood
Successfully installed molywood-0.153
Below we can see the output in case we try to execute molywood and the application find out some missing dependencies:
$ molywood
ffmpeg not found in PATH
numpy not found
matplotlib not found
seaborn not found


 *** Missing dependencies were found. To batch-install all of them, simply run

    'molywood-gen-env'

 (provided that molywood was installed via pip), and then type

    'source activate molywood'

 (or 'conda activate molywood', depending on your conda setup) to activate the virtual environment. ***
So now we have two applications installed:
- molywood: command line executable.
- molywood-gen-env: helper for creating a new conda environment in case any dependencies are missing.
In case you had installed molywood in a conda environment, the molywood-gen-env helper will ask you if you want to add the missing dependencies in the current environment or if you want to create a new environment:
$ molywood-gen-env
ffmpeg not found in PATH
numpy not found
matplotlib not found
seaborn not found

 Do you want to create a new conda environment called "molywood"
 (might take up more space), or only add dependencies to the current one
 (faster and lighter, but less modular)?


 Type 'n' to create a new one, or 'u' to update existing one:
After create or update the environment we must wait a bit while the molywood-gen-env helper installs all the missing dependencies in the environment:
 >>> n
Collecting package metadata (repodata.json): done
Solving environment: done

Downloading and Extracting Packages
pyqt-5.12.3          | 6.5 MB    | ################################################################################################################### | 100%
seaborn-0.10.1       | 158 KB    | ################################################################################################################### | 100%
Preparing transaction: done
Verifying transaction: done
Executing transaction: done
#
# To activate this environment, use
#
#     $ conda activate molywood
#
# To deactivate an active environment, use
#
#     $ conda deactivate
In the example above, the molywood-gen-env helper has not found ffmpeg, so it has created a new conda environment named molywood in which it's installed this dependency.
The next step is to activate the recently created molywood environment:
conda activate molywood
Or, depending on your conda setup:
source activate molywood
Now we can manually check that indeed all the dependencies are installed in our computer:
(molywood) $ which vmd
/usr/local/bin/vmd
(molywood) $ which ffmpeg
/path/to/env/bin/ffmpeg
(molywood) $ which convert
/usr/bin/convert
As we can see, VMD and ImageMagick were already installed in /usr/local/bin/, while ffmpeg has been installed in the molywood environment.
Now we can run molywood in sample mode and display only:
(molywood) $ molywood

 Warning: no input data was provided.

 To run Molywood, provide the name of the input file, e.g. 'molywood script.txt'.

 To run a sample visualization, type 'y'.

 To generate a sample input, type 'i'.

 Pressing 'Enter' (or entering any other command) will terminate the script.
 >>> y
 Do you want to render the movie ('r'), or display only ('d')?
 >>> d
 Sample movie with pdb 1w0t, render mode off
Now rendering scene: scene
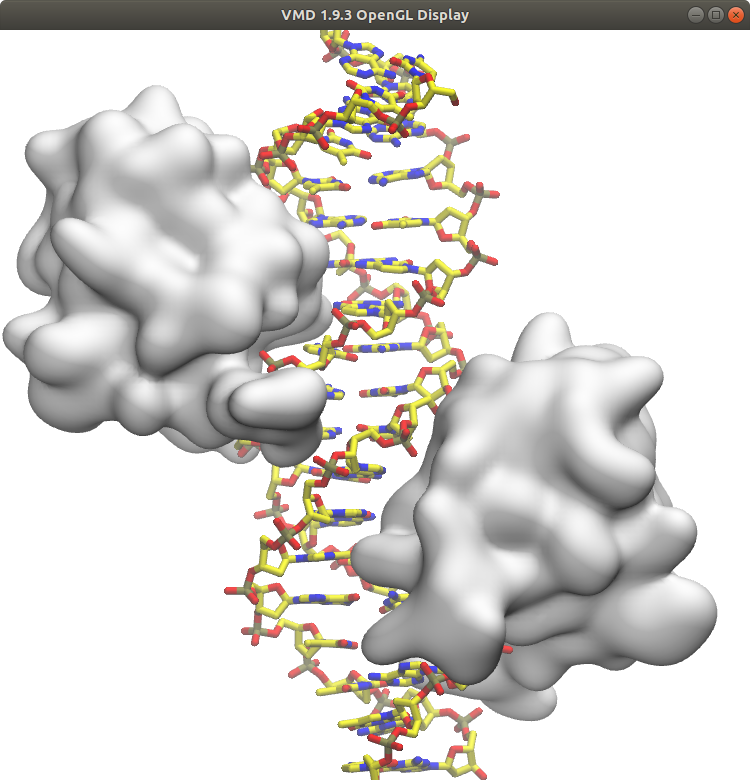
As a result of the example above, molywood will display us a sample visualization in a VMD window:
Now we can run molywood in sample mode and render the movie:
(molywood) $ molywood

 Warning: no input data was provided.

 To run Molywood, provide the name of the input file, e.g. 'molywood script.txt'.

 To run a sample visualization, type 'y'.

 To generate a sample input, type 'i'.

 Pressing 'Enter' (or entering any other command) will terminate the script.
 >>> y
 Do you want to render the movie ('r'), or display only ('d')?
 >>> r
 Sample movie with pdb 1w0t, render mode on
Now rendering scene: scene
The example above will generate the next files:
(molywood) $ ls -la
total 2220
drwxr-xr-x  2 user user    4096 Apr 22 17:46 .
drwxr-xr-x 13 user user    4096 Apr 22 17:14 ..
-rw-r--r--  1 user user  176904 Apr 22 17:46 1W0T.pdb
-rw-r--r--  1 user user     691 Apr 22 17:46 sample_molywood_input.txt
-rw-r--r--  1 user user    4299 Apr 22 17:46 sample_movie_ffmpeglog.moly
-rw-r--r--  1 user user 2057736 Apr 22 17:46 sample_movie.mp4
-rw-r--r--  1 user user   11170 Apr 22 17:46 scene_vmdlog.moly
-
1W0T.pdb
PDB file downloaded for generating the sample example.
-
sample_molywood_input.txt
Molywood input file.
$ global fps=10 render=f draft=t name=sample_movie $ scene pdb_code=1w0t resolution=750,750 # scene zoom_in scale=1.4 fit_trajectory axis=y selection="nucleic and not backbone" make_transparent material=Opaque highlight selection="nucleic and noh" material=Diffuse style=licorice color=type mode=u highlight selection=protein material=Diffuse style=quicksurf color=white mode=u {rotate axis=y angle=720 t=2s sigmoid=sls fraction=:0.25; zoom_in scale=1.5} rotate axis=y angle=720 t=2s sigmoid=sls fraction=0.25:0.5 rotate axis=y angle=720 t=2s sigmoid=sls fraction=0.5:0.75 {rotate axis=y angle=720 t=2s sigmoid=sls fraction=0.75:; zoom_out scale=1.5} -
sample_movie_ffmpeglog.moly
FFmpeg log file.
ffmpeg version 3.1.3-static http://johnvansickle.com/ffmpeg/  Copyright (c) 2000-2016 the FFmpeg developers
  built with gcc 5.4.1 (Debian 5.4.1-1) 20160803
  configuration: --enable-gpl --enable-version3 --enable-static --disable-debug --enable-libmp3lame --enable-libx264 --enable-libx265 --enable-libwebp --enable-libspeex --enable-libvorbis --enable-libvpx --enable-libfreetype --enable-fontconfig --enable-libxvid --enable-libopencore-amrnb --enable-libopencore-amrwb --enable-libtheora --enable-libvo-amrwbenc --enable-gray --enable-libopenjpeg --enable-libopus --enable-libass --enable-gnutls --enable-libvidstab --enable-libsoxr --enable-frei0r --enable-libfribidi --disable-indev=sndio --disable-outdev=sndio --enable-librtmp --enable-libmfx --enable-libzimg --cc=gcc-5
...
-
sample_movie.mp4
Rendered movie.
-
scene_vmdlog.moly
VMD log file.
/usr/local/lib/vmd/vmd_LINUXAMD64: /usr/lib/x86_64-linux-gnu/libGL.so.1: no version information available (required by /usr/local/lib/vmd/vmd_LINUXAMD64)
Info) VMD for LINUXAMD64, version 1.9.3 (November 30, 2016)
Info) http://www.ks.uiuc.edu/Research/vmd/
Info) Email questions and bug reports to vmd@ks.uiuc.edu
Info) Please include this reference in published work using VMD:
Info)    Humphrey, W., Dalke, A. and Schulten, K., `VMD - Visual
Info)    Molecular Dynamics', J. Molec. Graphics 1996, 14.1, 33-38.
Info) -------------------------------------------------------------
...